Quick Start Guide - Desktop Edition
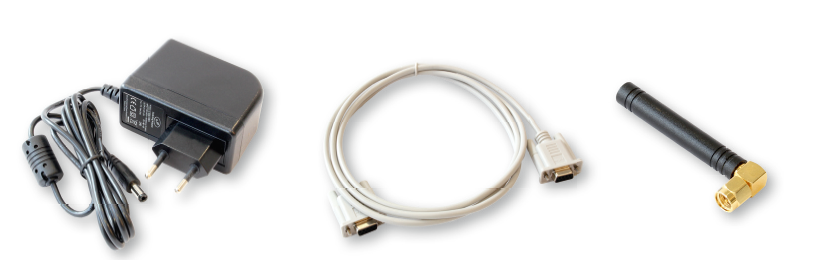
What is supplied?
- Desktop Edition
- Power supply unit
- RS 232 cable
- Antenna
brevis.one SMS Gateway

1 Insert the SIM card
- Insert the SIM card
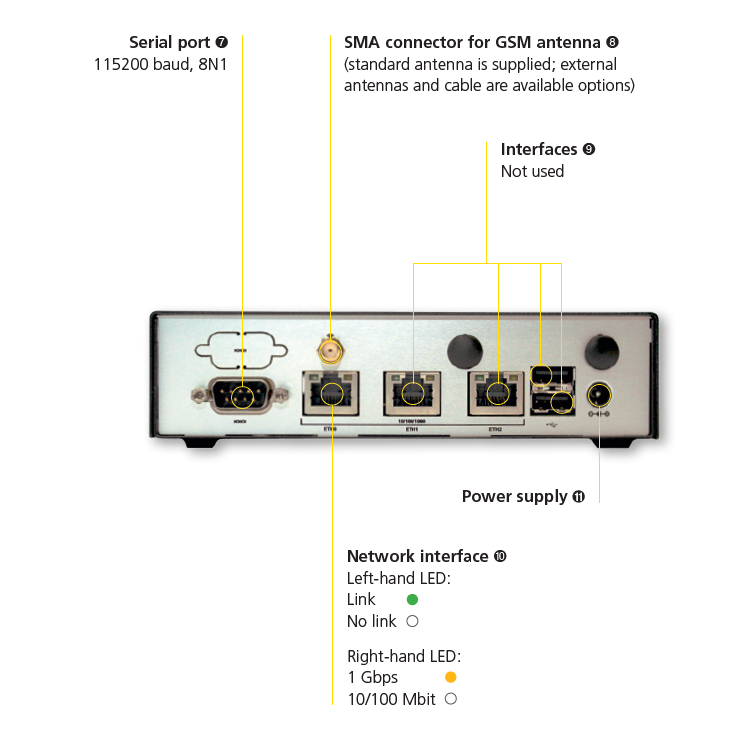
2 Screw on the antenna
- Screw the antenna to the SMA connector
3 Connect the network cable
- Connect an RJ-45 network cable. Please use the Ethernet port ETH0
4 Connect the power cable
- Connect the power cable to the device. The power indicator will now light up
5 Network configuration
- If your network has a DHCP server, it can issue an IP address to the brevis.one SMS Gateway. If no DHCP is available, the device will start with the standard IP 192.168.1.1.
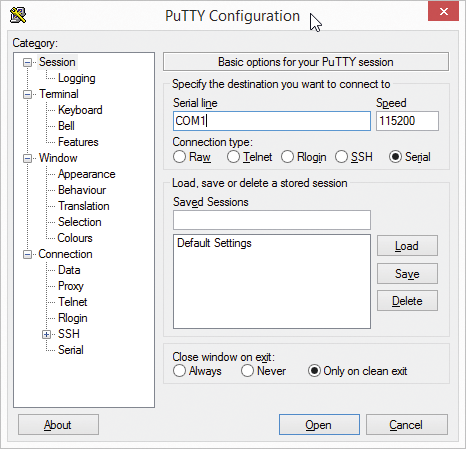
- If you do not know the IP address assigned by the DHCP, you have the option of requesting it via the serial port. For this purpose, connect your PC using a terminal program (e.g. PuTTY) and the port cable with the Gateway
- The speed of the interface here is 115200 baud (8N1)
- A text-based interface appears in which the current IP address is shown under the Version menu option. The IP address can be altered as you wish under the Network menu option.
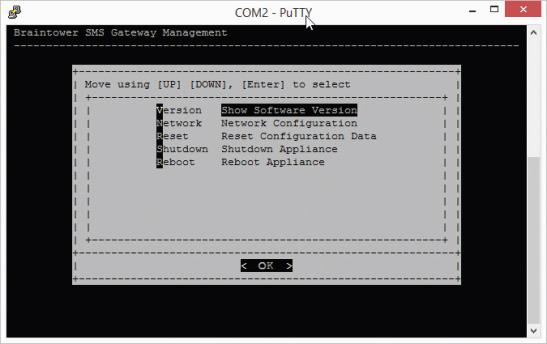
- If you make the network settings using the serial port, they will only be temporary and will be lost when the Gateway is restarted.
- Permanent network settings should be made in the web interface.
- You can now access the web interface via the IP address. Log in here with the user name “admin” and the password “admin”.
6 Licensing
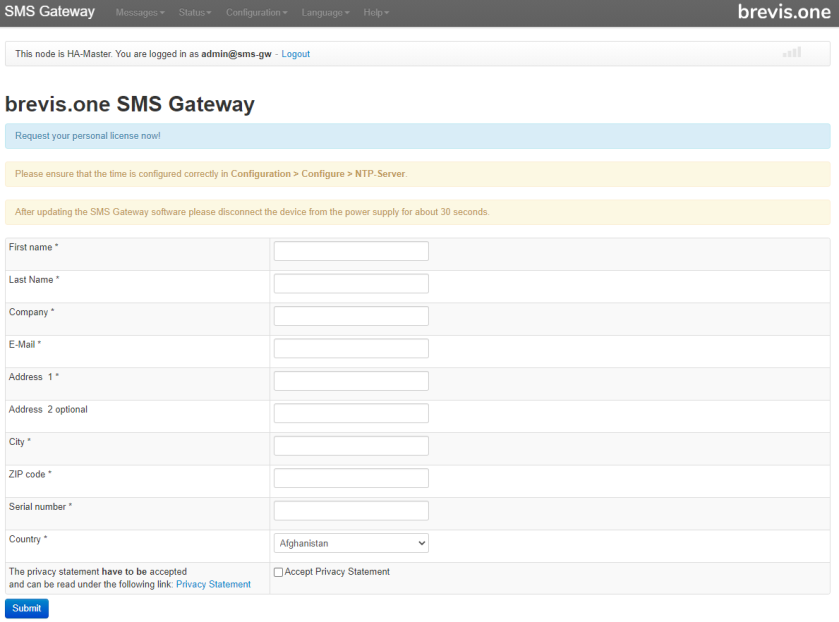
- After logging into the web interface, you must request a licence for your Gateway. As long as this process has not been completed you will constantly be requested to do so after logging in.
- For this purpose, please complete the form and press on the Request button.
- You will then receive a licensing request which you can request through the Servicedesk (https://brevis.one/en/licreq.html)
- After our licensing team has processed the request, you will receive a licensing file which you should upload at this point to the SMS Gateway
7 SIM card
- Select SIM card from the Configuration menu option.
- Enter the PIN of the inserted SIM card here.
- Select Reboot / shut down from the Configuration menu option.
- Restart the SMS Gateway
8 Send a test message
- Enter the IP in your browser and log in again.
- Then select send to number from the SMS menu option.
- You can now send a text message on the screen which then appears by entering a telephone number and a message.
- Further assistance is provided in the Help menu option.